
| 일 | 월 | 화 | 수 | 목 | 금 | 토 |
|---|---|---|---|---|---|---|
| 1 | 2 | 3 | 4 | 5 | 6 | |
| 7 | 8 | 9 | 10 | 11 | 12 | 13 |
| 14 | 15 | 16 | 17 | 18 | 19 | 20 |
| 21 | 22 | 23 | 24 | 25 | 26 | 27 |
| 28 | 29 | 30 | 31 |
- unity 게임 개발
- Unity 독학
- 오픽 im1
- Unity Chess
- 게임 개발
- 크래프톤 게임 정글 랩
- 유니티 체스
- 유니티 대화
- unity
- 크래프톤 정글 게임 랩
- 유니티 퀘스트
- 게임 개발 독학
- 유니티 미연시
- unity 강의
- 크래프톤 정글 게임랩
- ETRI 연구연수
- 게임 독학
- node.js
- unity 개발
- unity 설치
- 유니티 독학
- unity 공부
- protobuf란
- protobuf 란?
- 오픽 im1 5일
- 크래프톤 정글랩
- unity 게임
- 유니티 스토리
- 크래프톤
- 유니티
- Today
- Total
하참이의 아이디어노트
Unity 강의 8일차 (2) - 점수 기록 본문
본 강의는 다음 문서를 참고하여 제작하였습니다. 자세한 내용은 하단 링크를 참조하시거나 댓글로 질문 남겨주시면 성심성의껏 답변 드리겠습니다.
5.2강 - 점수 기록 - Unity Learn
개요: 오브젝트가 씬으로 날아오고 플레이어가 이를 클릭해 파괴할 수 있게 되었지만, 아무 일도 일어나지 않습니다. 이 수업에서는 사용자 인터페이스를 통해 플레이어의 점수를 추적해서 표
learn.unity.com
TextMeshPro는 Unity 게임에서 Text를 깔끔하게 사용하기 위한 빌트인 에셋입니다.


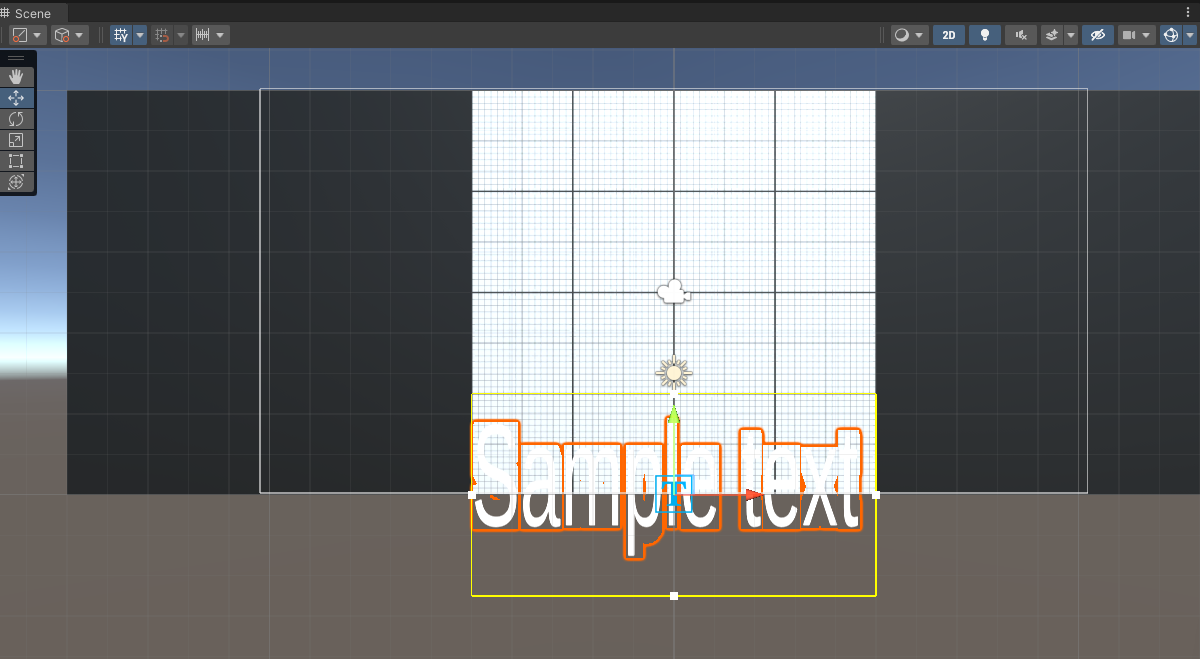
Text (TMP, Text Mesh Pro 의 약자입니다. )의 이름을 Score Text로 바꿉니다. 네. 점수판을 나타내기 위한 UI 입니다.
Score Text가 게임 창에서 잘 보이도록 크기를 줄입니다.
여기서 UI 오브젝트는 게임 오브젝트와 다른 배치 방식을 가지고 있음을 알 수 있습니다.

UI는 Transform이 아닌 Rect Transform을 가지고 있습니다.
X, Y, Z 기준의 위치, Rotation, Scale을 가질 수 있는 것은 일반 Transform과 동일하지만
Width와 Height, Anchors와 Pivot을 가질 수 있다는 것이 차이점입니다.
Width와 Height는 Scale과의 차이가 있을까요?
Scale은 '폰트를 포함'한 UI의 전체적인 크기를 조절한다면
Width와 Height는 폰트를 거스르지 않고 폰트 박스의 크기만을 조절합니다.


그렇다면 Anchors와 pivot은 무엇일까요?

Anchors는 X와 Y의 각각 최솟값과 최대값을 가지고 있습니다. Anchors를 조절하면 게임 화면의 크기를 조절했을 때 버튼이 이동하거나 크기가 조절되는 비율을 조절할 수 있습니다.
Pivot은 말 그대로 아이콘으로서의 중심입니다. 회전시킬 때의 회전축이 되고, 아이콘을 정렬하면 정렬의 기준이 되기도 합니다.
즉 좌측 상단에 위치하도록 Scale과 PosX, PosY의 값을 조절해봅시다.
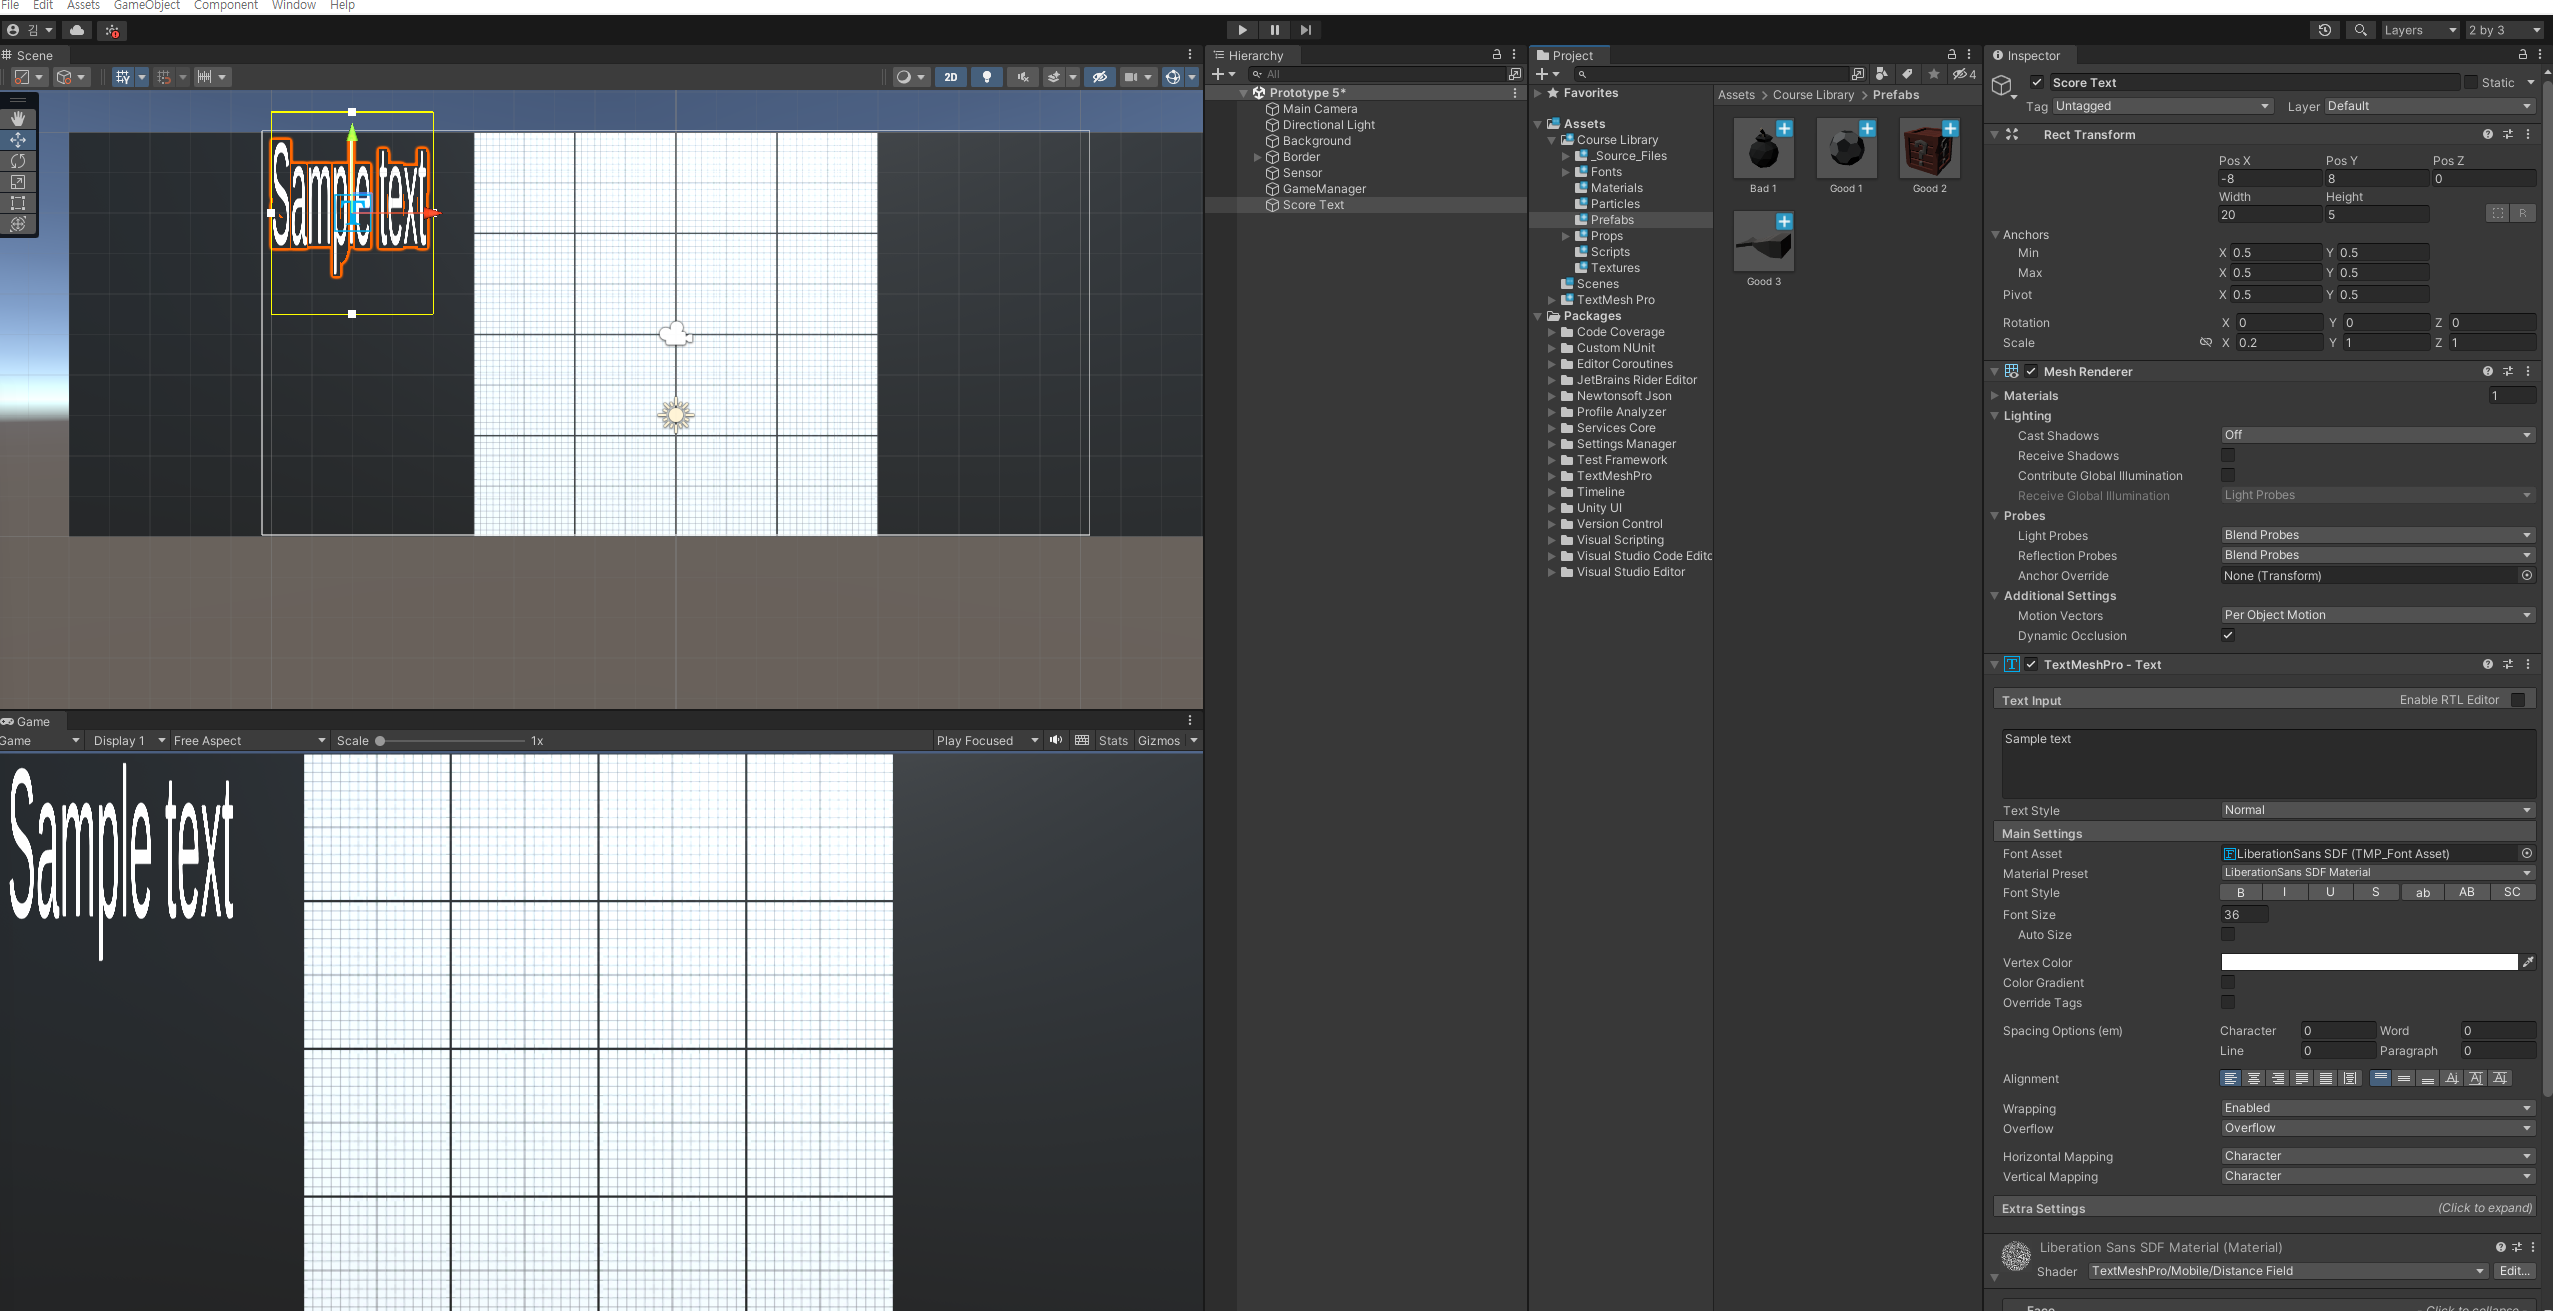
TextMeshPro 오브젝트에는 TextMeshPro - Text 컴포넌트를 가지고 있습니다.
거기에는 Text 프로퍼티를 변경하여 오브젝트의 Text를 변경 할 수 있습니다.
Text를 Score : 로 변경합니다.

또한 폰트와 글 색상, 스타일 등 다양한 것들을 변경할 수 있습니다.
이제 Text에 점수를 출력하기 위한 GameManager 스크립트를 변경합니다.
using System.Collections;
using System.Collections.Generic;
using UnityEngine;
using TMPro;

public class GameManager : MonoBehaviour
{
    public List<GameObject> targets;
    private int score;
    public TextMeshProUGUI scoreText;

    private float spawnRate = 1.0f;
    void Start()
    {
        StartCoroutine(SpawnTarget());
        score = 0;
        scoreText.text = "Score : " + score;
    }

    IEnumerator SpawnTarget()
    {
        while (true)
        {
            yield return new WaitForSeconds(spawnRate);
            int index = Random.Range(0, targets.Count);
            Instantiate(targets[index]);
        }
    }

    // Update is called once per frame
    void Update()
    {

    }
}
int 형태로 score를 선언하고 start 함수에서 0으로 변경, 출력으로 값을 변경합니다. TextMeshPro를 스크립트에서 사용하기 위해 using TMPro;를 사용하는 것을 잊지 맙시다.
이제 지속적으로 값을 변경할 수 있도록 해보겠습니다.
코루틴을 사용하여 시간이 지날 때 마다 점수를 추가하고, UpdateScore를 사용하여 TMP 텍스트를 업데이트 하도록 합니다.
GameManager 스크립트를 다음과 같이 수정합니다.
using System.Collections;
using System.Collections.Generic;
using UnityEngine;
using TMPro;
public class GameManager : MonoBehaviour
{
public List<GameObject> targets;
private int score;
public TextMeshProUGUI scoreText;
private float spawnRate = 1.0f;
void Start()
{
StartCoroutine(SpawnTarget());
score = 0;
UpdateScore(0);
}
IEnumerator SpawnTarget()
{
while (true)
{
yield return new WaitForSeconds(spawnRate);
int index = Random.Range(0, targets.Count);
Instantiate(targets[index]);
UpdateScore(5);
}
}
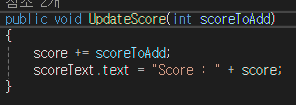
private void UpdateScore(int scoreToAdd)
{
score += scoreToAdd;
scoreText.text = "Score : " + score;
}
// Update is called once per frame
void Update()
{
}
}
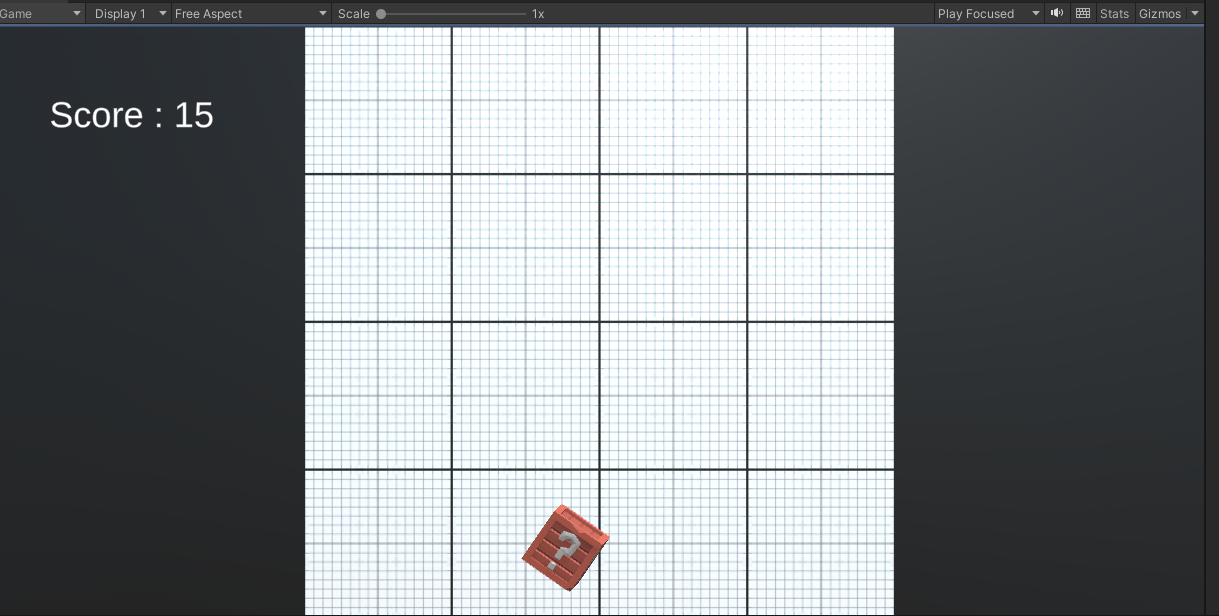
UnityEditor에서 GameManager 스크립트 컴포넌트에 Score Text를 부착하고 게임을 실행해봅니다.
점수가 오르는 것을 확인 할 수 있습니다.
이제 오브젝트가 파괴될 경우 게임 점수가 오르도록 변경해봅시다.
시간이 지날 때 점수가 오르는 기믹을 삭제합니다.

Target 스크립트를 변경합니다.
using System.Collections;
using System.Collections.Generic;
using UnityEngine;

public class Target : MonoBehaviour
{
    private Rigidbody targetRb;

    private float minSpeed = 12;
    private float maxSpeed = 16;
    private float maxTorque = 10;
    private float xRange = 4;
    private float ySpawnPos = -6;

    private GameManager gameManager;
    public int pointValue;

    void Start()
    {
        targetRb = GetComponent<Rigidbody>();
        targetRb.AddForce(RandomForce(), ForceMode.Impulse);
        targetRb.AddTorque(RandomTorque(), RandomTorque(), RandomTorque(), ForceMode.Impulse);
        transform.position = RandomSpawnPos();

        gameManager = GameObject.Find("GameManager").GetComponent<GameManager>();
    }

    Vector3 RandomForce()
    {
        return Vector3.up * Random.Range(minSpeed, maxSpeed);
    }

    float RandomTorque()
    {
        return Random.Range(-maxTorque, maxTorque);
    }

    Vector3 RandomSpawnPos()
    {
        return new Vector3(Random.Range(-xRange, xRange), ySpawnPos);
    }
    private void OnMouseDown()
    {
        Destroy(gameObject);
        gameManager.UpdateScore(pointValue);
    }

    private void OnTriggerEnter(Collider other)
    {
        Destroy(gameObject);
    }

    void Update()
    {

    }
}
사실 게임 메니저는 싱글턴 패턴을 써야 하지만 지금은 이정도로 만족합시다.
게임 메니저 오브젝트를 찾고, 해당 오브젝트의 게임 메니저 컴포넌트에 접근해 타겟을 파괴하면 점수를 올리도록 하겠습니다.
또한 점수의 하드코딩을 제거하기 위한 pointValue선언도 있습니다.
파티클도 추가해봅시다. Target.cs 스크립트를 다음과 같이 수정합니다.
using System.Collections;
using System.Collections.Generic;
using UnityEngine;

public class Target : MonoBehaviour
{
    private Rigidbody targetRb;

    private float minSpeed = 12;
    private float maxSpeed = 16;
    private float maxTorque = 10;
    private float xRange = 4;
    private float ySpawnPos = -6;

    private GameManager gameManager;
    public int pointValue;

    public ParticleSystem explosionParticle;

    void Start()
    {
        targetRb = GetComponent<Rigidbody>();
        targetRb.AddForce(RandomForce(), ForceMode.Impulse);
        targetRb.AddTorque(RandomTorque(), RandomTorque(), RandomTorque(), ForceMode.Impulse);
        transform.position = RandomSpawnPos();

        gameManager = GameObject.Find("GameManager").GetComponent<GameManager>();
    }

    Vector3 RandomForce()
    {
        return Vector3.up * Random.Range(minSpeed, maxSpeed);
    }

    float RandomTorque()
    {
        return Random.Range(-maxTorque, maxTorque);
    }

    Vector3 RandomSpawnPos()
    {
        return new Vector3(Random.Range(-xRange, xRange), ySpawnPos);
    }
    private void OnMouseDown()
    {
        Destroy(gameObject);
        Instantiate(explosionParticle, transform.position, explosionParticle.transform.rotation);
        gameManager.UpdateScore(pointValue);
    }

    private void OnTriggerEnter(Collider other)
    {
        Destroy(gameObject);
    }

    void Update()
    {

    }
}
파티클의 경우는 추가적으로 설명하지 않겠습니다.
Library > Particles에 존재하는 Particle중 하나를 선택해 프리팹의 Target 스크립트 컴포넌트에 추가해줍니다.
게임을 실행하면 파티클이 터지는 것을 확인 할 수 있습니다.

'Unity > Unity 기초' 카테고리의 다른 글
| Unity 강의 8일차 (4) - 난이도 설정 (0) | 2025.01.31 |
|---|---|
| Unity 강의 8일차 (3) - 게임 오버와 재시작 (0) | 2025.01.31 |
| Unity 강의 8일차 (1) - UI 마우스 클릭 (0) | 2025.01.31 |
| Unity 강의 7일차 (3) - 파워업 및 카운트다운 (0) | 2025.01.22 |
| Unity 강의 7일차 (2) - 플레이어 따라가기 (0) | 2025.01.22 |


